Fishing bags look like ordinary outdoor backpacks until you set one down on a boat deck. Salt spray seizes a standard zipper slider inside a season. Wet sand grinds through a plain nylon base. A hook punches through a pocket that was never reinforced. The failures that cost an outdoor brand money rarely show up in the first shipment. They show up in the second season, once the listing is live and the returns are already logged. Sourcing a custom fishing bag program is mostly a matter of deciding which of those failures you’re willing to pay to prevent.
A custom fishing bag comes down to four decisions, and they have to be locked in order: primary fishing scenario, bag format, fabric and construction method, and hardware corrosion level. Settle those four before you ask anyone to quote, and you can cut sampling from three or four rounds down to one or two. Logo method, packaging, and carton marks are commercial details that follow later.
This guide walks through those decisions in the order buyers usually have to make them.
What separates a fishing bag from a general outdoor bag?
Three things, and none of them is the shell fabric: corrosion-resistant hardware, a reinforced or molded base, and internal dimensions matched to standard tackle tray footprints. A daypack can be fully waterproof and still fail as a fishing bag, because it has none of the three.
Corrosion moves fastest, so start there. Saltwater attacks fittings long before it attacks fabric. A metal coil zipper that survives years of freshwater use can seize after a handful of trips in the salt, and a seized main zipper turns the whole bag into a box you open once. Corrosion-resistant parts cost a factory noticeably more than standard ones. That’s why value bags leave them out, and why the gap between a cheap bag and a properly built one appears in the second season rather than the first.
Hardware and corrosion
Moulded acetal teeth, POM or electroplated sliders, anodised aluminium D-rings and sabre clips, and brass or POM drainage eyelets. These are the parts worth naming in your spec, and the ones a factory will substitute if you leave them open.
The zipper end deserves its own line. On a sealed closure it takes grit and impact where the slider parks, which makes it the usual failure point. A molded end cap helps. So does a pull assist, either a T-grip or an assist cord, because an airtight zipper takes real leverage to close, and a seal the angler can’t fully close with cold wet hands isn’t a seal.
Gear interfaces
Anglers organize tackle in trays, and trays come in two common footprints, 3600 and 3700. Those dimensions should drive your internal layout, not the other way round. Get the tray sizes your target market already owns before anyone draws a panel.
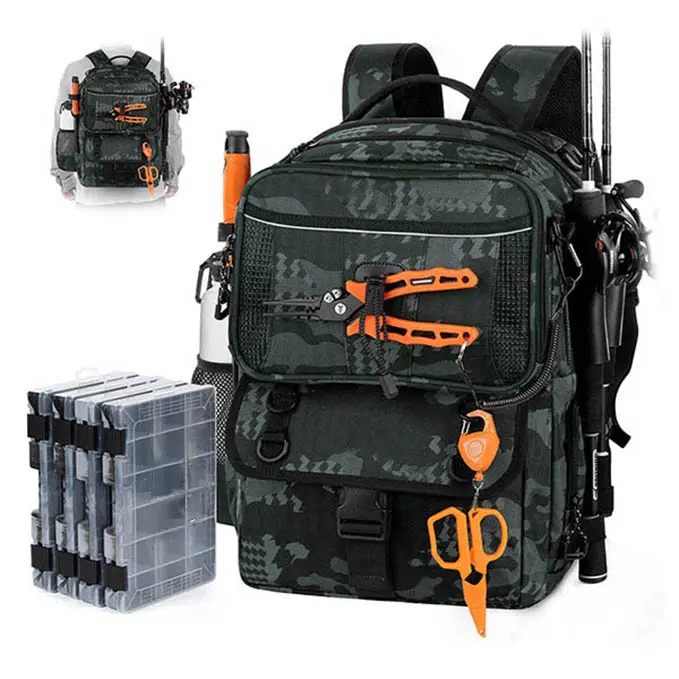
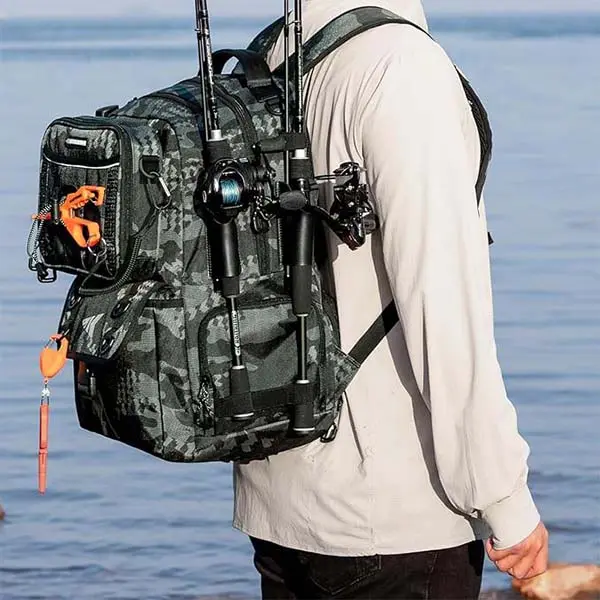
The same applies to rods. A holder that loops a butt section and leaves the tip swinging is decoration. Look for paired holders with a tip pocket, a net sleeve, and a plier position the angler can reach without taking the pack off. On a surf fishing backpack with rod holder features, that interface is often the whole reason someone buys the bag.
The base and the deck
The base takes more abuse than any other panel because it meets wet sand, rock, and fish. Three approaches cover most programs:
- Hard base panel: best stand-up behavior and tray stacking, heavier.
- Moulded EVA base: stability plus water resistance at the bottom, mid cost.
- Skid or TPU base reinforcement: wear control on decks and ledges.
| Feature | General daypack | Fishing bag |
|---|---|---|
| Hardware | Painted steel, standard coil zip | Moulded acetal or marine-grade slider, anodized rings |
| Base | Flat fabric or light foam | Hard panel, molded EVA, or skid reinforcement |
| Internal layout | Free-form compartments | Tray footprints plus rod, plier, and net interfaces |
| Water spec | DWR coating with rain cover | Defined as spray, splash, or full submersion |
| Cleaning | Spot clean | Rinse, drain, and air dry before storage. |
Which fishing bag formats do anglers actually buy?
Five formats cover most of the category, and the right way to choose is by how the angler reaches the water, not by how much gear they own. Picking the wrong format costs a program far more than picking the wrong fabric.
The format sets the pattern, the panel count, and the hardware bill. Change format midway through development and you’re back to the first sample.
| Format | Typical capacity | Where it wins | Structural focus |
|---|---|---|---|
| Tackle bag, shoulder bag, or duffel | 20 to 45 L | Boat decks, car-based trips | Flat opening, tray stacking, molded base |
| Tackle backpack | 25 to 45 L | Hiking in, bank fishing | Padded harness, front-loader access, rod holders |
| Sling pack | 8 to 18 L | Wading, stream work | Single-shoulder swing to front |
| Compact bag | 4 to 12 L | Short sessions, one technique | Low-profile, belt or chest carry |
| Submersible or cooler format | 8 to 40 L | Kayaking, wading, catch retention | Welded body, airtight zip, insulated liner |
Tackle bags and backpacks
This is the volume end of the market. A 40 L pack that holds four 3600 trays replaces both a tackle box and a shoulder bag, which is why it sells to anglers who walk to their spots. Two design choices drive most of the difference here: whether the bag opens from the front or the top and whether the harness is a real harness or a pair of straps. Front-loading access matters more than it sounds, because it lets someone pull a tray without unpacking the bag on wet ground.
Sling packs and compact formats
The fishing bag’s small end of the range serves wading and moving water, where the angler is rarely still. A sling swings from back to front in one movement, which is the entire design argument. Compact bags of 4 to 12 L suit a single technique and a short session. Both formats sell in higher unit volume at lower tooling cost, which makes them a reasonable first program for a brand entering the category.
Submersible formats and cooler combinations
Two composite formats sit alongside the tackle shapes. One is the submersible pack: roll top or airtight zip, welded body, built for kayak and wading use where the bag genuinely goes under. The other pairs a backpack harness with an insulated liner and a drain plug for catch retention or bait. These are the shapes that need the fullest spec, because a leak in either one is a product failure rather than an inconvenience. For brands building out a full range, the OEM Fishing Tackle Backpack shape covers the volume end, while these formats sit beside it.
What materials and construction make a fishing bag waterproof?
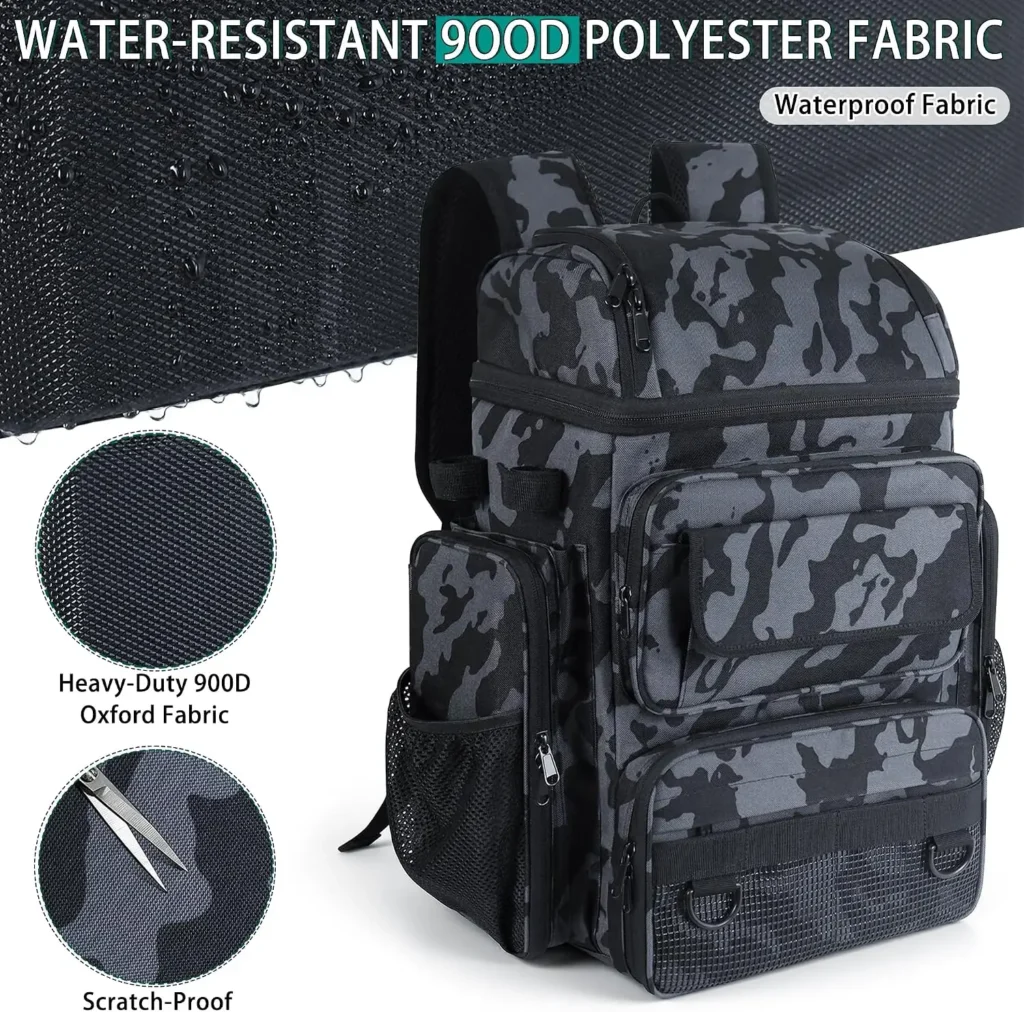
Waterproof fabric doesn’t make a waterproof bag. What decides it is the seam treatment, stitched and taped or high-frequency welded, plus the closure. Choose those two before you choose fabric weight.
Fabric weight drives abrasion resistance and hand feel. Seam construction drives whether water gets in. Buyers routinely spend the technical conversation on the wrong one.
| Material | Water performance | Wear and cleaning | Typical use |
|---|---|---|---|
| 600D coated polyester | Water resistant | Easy to wipe clean | General shells, mid-price tackle bags |
| 1680D coated fabric | Water resistant | Higher abrasion resistance | Premium shells, heavy-use bags |
| TPU laminated fabric | Waterproof when welded | Wipes clean of slime and mud | Submersible packs, wet-deck use |
| PVC tarpaulin | Waterproof when welded | Very abrasion resistant, structure holds | Duffels, coolers, kayak formats |
| Moulded EVA base | Water resistant at the base only | Rinses clean | Stability panels across the range |
Sewn versus high-frequency welded
A sewn bag gives you shape freedom and a lower unit cost. Water resistance comes from the coating plus taped or sealed seams, and it holds up fine for rain and splash. A welded bag bonds panels without thread, so there’s no stitch line for water to follow, which is what makes true submersion possible. The trade is design freedom and cost. Welding also constrains where you can place a logo, because you can’t interrupt a structural weld with an appliqué.
Water resistant, water repellent, and submersible
These three terms get used interchangeably in listings and shouldn’t be. Water repellent means the surface sheds rain until it wets out. Water resistance means the shell holds off spray and short exposure. “Submersible” means the contents survive going under. If your spec doesn’t name one of the three, you’ll get whichever the factory finds easiest, and the marketing copy will claim all of them. Write the test condition instead of the adjective.
Zippers and closures
Three options, in ascending cost and descending design freedom: standard coil zip behind a storm flap, water-repellent zip, and airtight waterproof zip. The airtight option is the only one that supports a submersible claim, and it needs the end cap and pull assist described earlier. On splash-rated pockets, state plainly that they aren’t for immersion. That one line of honesty keeps a warranty program manageable.
Which features should go into your fishing bag spec?
Lock the scenario first, then the layout, then the accessory list. Every accessory you add changes the minimum order quantity and the sampling cycle, so the list has to be deliberate rather than aspirational.
Features that carry their cost
- Paired rod holders with tip pockets
- Hard or molded EVA base
- Drainage eyelets at pocket bases
- Reflective trim on the front and straps
- Removable plier holster that clips to a belt
- Removable divider in the main compartment
- Webbing ladders for modular pouches
- Hydration sleeve
None of these is exotic. Each one adds tooling, labor, or both, so rank them. A drainage eyelet costs almost nothing and prevents the trapped-water smell that drives negative reviews. A molded base changes the cutting and assembly process.
Features that need a separate buy
Three features sit outside the standard bill of materials and are usually quoted as their own line: an integrated LED panel for low-light rigging and pack-out, an insulated liner with a drain plug, and a hydration bladder sleeve with hose routing. The LED panel in particular is what turned the lighted fishing backpack into its own subcategory, because it solves a real problem, rigging in the dark, rather than adding a gadget.
Layout decisions that drive the quote
Give the factory your tray footprint first. Then decide opening direction, divider count, and pocket count. Each additional divider adds a work station, and each additional zip adds a step. A design with nine pockets and two dividers will quote differently from one with the same volume and four pockets. If cost is tight, cut pocket count before you cut hardware grade.
How do OEM and ODM projects differ for fishing bags?
OEM means you supply a complete tech pack, and the factory builds it, with a manufacturability review along the way. ODM means you supply a scenario, a loadout list, and a target retail price, and the factory proposes the construction. The two models carry risk differently and buy different amounts of engineering time.
What to hand over in each model
For OEM, you need dimensioned drawings, a bill of materials with fabric and hardware grades, artwork files in vector format, packaging specifications, and a reference sample if you have one. For ODM, you need the fishing scenario, the tray and rod sizes the bag must accept, the water spec, the branding package, and the target price band. A factory can work from sketches, but it can’t work from a photograph alone.
Branding methods and their tooling
Screen print, heat transfer, embroidery, woven label, molded rubber patch, metal plate. The first two are the cheapest and the least durable in salt and sun. A molded rubber or silicone patch survives saltwater far better than direct printing because the color sits in the material rather than on it. Embroidery needs digitizing, patches and metal plates need a mold, and each of those is a one-time cost that only makes sense above a certain quantity. Ask what the tooling charge is before you choose the method.
What do MOQ, sampling, and lead times look like?
MOQ in this category isn’t set by quantity alone. Four inputs decide it: fabric dye minimums, hardware order minimums, logo molds and cutting dies, and the number of colors in the order. The binding constraint is whichever of the four is highest on your design.
Here is the sequence, with the ranges factories commonly quote for this kind of work. Confirm each one for your own program, since complexity moves them.
| Stage | Commonly quoted range | What it depends on |
|---|---|---|
| Spec and DFM review | 3 to 10 days | How complete the tech pack is |
| First sample | 7 to 15 days | Material availability, pattern complexity |
| Revisions | 3 to 10 days each | Scope of change |
| Pre-production sample | 5 to 12 days | Tooling readiness |
| Bulk production | 30 to 50 days | Quantity, color count, welding versus sewing |
| Inspection and carton prep | 2 to 5 days | AQL level, packaging complexity |
| Ocean transit | 3 to 6 weeks | Destination, port schedule |
What moves the MOQ up or down?
Using in-stock fabric and standard hardware keeps the minimum in the low hundreds per style and colorway. Custom-dyed fabric, a custom logo mold, or a bespoke molded base pushes it up, sometimes by a factor of two or three. If you’re launching a first run, ask which combinations of your specs could be quoted at a lower minimum without changing the construction.
Lead-time starting points
Lead time has three possible starting points, and they differ by two to three weeks: deposit received, artwork finalized, or pre-production sample approved. Ask the factory to write the start point into the quotation. Otherwise, a schedule that looks comfortable shifts the moment approval takes an extra round.
What does a fishing bag RFQ need to include?
Twelve items. Miss any one of them and the most a factory can honestly give you is a range rather than a price.
| Item | What to state |
|---|---|
| Scenario and market | Bank, boat, kayak, or wading; target country |
| Format and capacity | Bag type plus volume in liters |
| Tray and rod sizes | Tray footprint; rod and net dimensions |
| Fabric direction | Shell, lining, insulation, base |
| Construction | Sewn or welded, and where |
| Hardware grade | Corrosion level, zipper class |
| Closure type | Storm flap, water-repellent, or airtight |
| Accessory list | Rod holders, lighting, drainage, insulation |
| Branding | Method, artwork files, placement |
| Quantity and colors | Total plus breakdown per SKU and color |
| Packaging | Polybag, hangtag, barcode, carton marks |
| Commercial terms | Incoterm, payment, delivery start point, validity |
Two failure patterns cover most bad RFQs. The first describes the bag only by end use, and the factory has to guess at every dimension. The second gives quantities without a per-SKU breakdown, so the price ladder can’t be calculated.
How is quality verified on a saltwater program?
Corrosion control and seal integrity are two separate inspection tracks. Hardware gets checked for salt attack, and the body gets checked for water entry. A single “passed inspection” line on a packing list covers neither.
Incoming inspection verifies the fabric roll and hardware batch against the approved reference. In-process checks cover stitch tension, weld continuity, and dimensional tolerance on the line. Final inspection covers function and appearance before carton packing. Sampling usually follows an AQL plan, which should be named in the purchase order rather than assumed.
Tests worth writing into the PO
- Salt spray exposure on hardware, using a standard fog test protocol such as ASTM B117, with acceptance defined as no red rust or pitting.
- Zipper cycling to a stated count, checked for binding and tooth loss.
- Static and repeated load tests on straps, handles, and D-ring attachment points.
- Weld inspection for continuity, corner coverage, overheating, and cold joints.
- Pressure or water-hold testing on any compartment claimed as waterproof.
- Drop testing on loaded bags, base down.
Each test needs a sample size, a pass criterion, and a named party responsible for the cost. That last point matters, because a claim on a wet-deck bag usually comes down to who agreed to pay for verification.
Common defects in welded and sewn bags
Welded bags fail at corners, at the zipper end, and where an accessory interrupts a weld. Sewn bags fail at stress points, at the base seam, and wherever bar-tacks were skipped. Both fail at drainage eyelets if the eyelet punches straight through unreinforced fabric. Ask for photographs of those five locations on the pre-production sample before you approve it.
Frequently asked questions
Do fishing bags need to be fully submersible?
Only if the angler actually goes under. Wading, kayaking, and surf fishing in rough water justify a submersible spec. Boat and bank anglers mostly need spray and splash protection, which costs less and is easier to build. Specifying submersion for a product that never gets submerged raises unit cost, weight, and tooling for no benefit the customer can see.
Can one fishing bag design serve both boat and shore anglers?
Rarely without compromise. Boat anglers want a stable, wide-based bag that sits flat on a deck. Shore anglers want a harness with real load distribution because they carry the bag rather than set it down. You can build one shape that does both adequately. You can’t build one that does both well. Most brands cover the two with separate formats rather than stretching a single design.
What has to be locked before a factory can quote?
Scenario, format, capacity, tray footprint, water spec, construction method, hardware grade, branding method, quantity breakdown, and delivery terms. Ten inputs. With all ten, a factory can quote a firm unit price. With fewer, you get a range and a list of assumptions, which is fine for budgeting and useless for a purchase order.